

Top
Authors
Published
20 Feb 2026Form Number
LP2377PDF size
25 pages, 1.9 MBSubscribed to LP2377.
Thank you for your feedback.
Table of Contents
Abstract
This paper provides a detailed guide for installing and configuring Lenovo XClarity One Hub on Lenovo ThinkEdge SE100 running Proxmox VE. It is also applicable to any other XClarity One Hub deployment on Proxmox VE.
This document is intended for IT professionals that need to manage Lenovo servers leveraging Lenovo XClarity One using a locally deployed XClarity One Hub. It is assumed that the reader has a basic knowledge of XClarity One, Lenovo servers and Proxmox VE.
Introduction
This paper describes how to install and configure Proxmox VE on Lenovo ThinkEdge SE100 and then how to install XClarity One Hub on Proxmox VE. We show step-by-step procedure to facilitate the adoption of such solution. Other than the specific Proxmox VE installation instructions for the ThinkEdge SE100, this procedure can also be applied for any other XClarity One Hub deployment on Proxmox VE.
Lenovo XClarity One and XClarity One Hub
Lenovo XClarity One is a versatile, unified management platform designed to simplify the administration of Lenovo servers. Available to be implemented as Hybrid cloud-based or on-premises local VM versions, this solution offers a consistent, user-friendly interface for monitoring, managing, and optimizing data center resources. With advanced automation capabilities, XClarity One centralizes and streamlines routine tasks, reduces operational complexity, and enhances system performance.
Whether deployed in the cloud or on-premises, XClarity One provides scalability, flexibility, and remote access, ensuring high availability and reliability for IT infrastructure. Ideal for businesses of all sizes, XClarity One delivers the tools and insights needed to drive operational efficiency and support business growth.
Lenovo XClarity One Portal is the main interface for the XClarity One solution, the XClarity One Portal can be in the Cloud or implemented On-Premise, the XClarity One Portal monitors and manages devices through one or more lightweight device managers called XClarity One Hubs.
The XClarity One Hubs are installed as lightweight Virtual Appliances on premise in data centers across multiple sites, where devices to be managed are located. The XClarity One Hubs act as secure bridges between your devices and the XClarity One Portal. The XClarity One hub reduces your security risk through using only a single secure connection between the XClarity One Portal and on-premises/private cloud-managed devices.
Lenovo ThinkEdge SE100
The Lenovo ThinkEdge SE100 is a purpose-built server that is 1/3 width and significantly shorter than a traditional server, making it ideal for deployment in tight spaces. It can be mounted on a wall, desktop or mounted in a rack. The SE100 server is AI optimized with increased processing power, storage and network closer to where data is generated. For customers that want to install servers outside data center looking for reduced latency by processing at the edge.
Its compact form factor makes it ideal for hosting an XClarity One Hub outside the production environment, allowing you to manage other servers without disrupting the XClarity One workflow when upgrades or reboots occur.
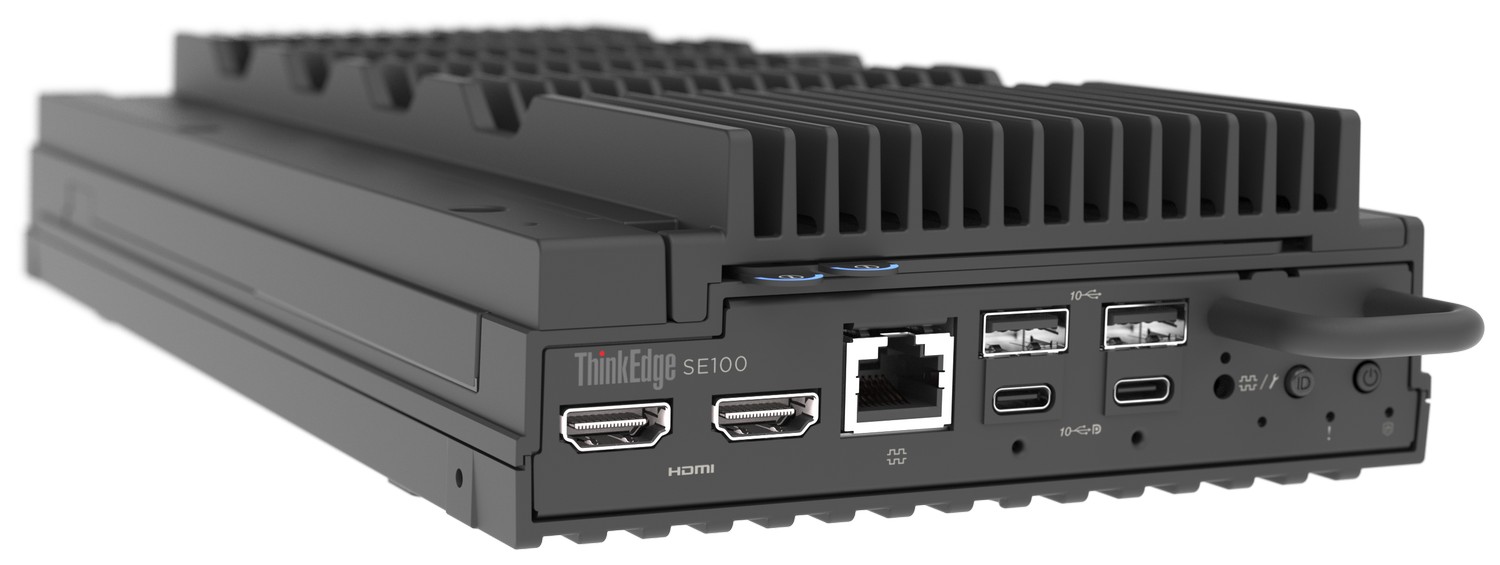
For more information about the SE100, see the ThinkEdge SE100 Product Guide.
Lab configuration
The following table lists the configuration of the SE100 we used in our lab environment.
The GPU in this configuration is not useful for our purposes, and was disabled into the UEFI settings.
We used Proxmox Virtual Environment 9.1 ISO for the installation:
https://enterprise.proxmox.com/iso/proxmox-ve_9.1-1.iso
Install Proxmox on ThinkEdge SE100
The installation of Proxmox Virtual Environment on ThinkEdge can be performed using the XClarity Controller as is possible on every ThinkSystem server.
The steps to install Proxmox VE are as follows:
- Connect to the XClarity Controller of the SE100
- Open the Remote Console
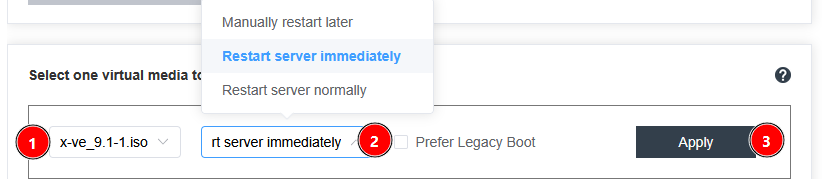
- Mount the Proxmox ISO
- Select the ISO in the first dropdown list and then select Restart server immediately from the second dropdown list, then click Apply.
- If you get a gray screen after selecting the Graphical Installation, you are probably landing in this error case (press CTRL+ALT+F2 to move to the error console):

Figure 3. Possible error during first installation phaseTo avoid this error, you need to change boot options with the following instructions:
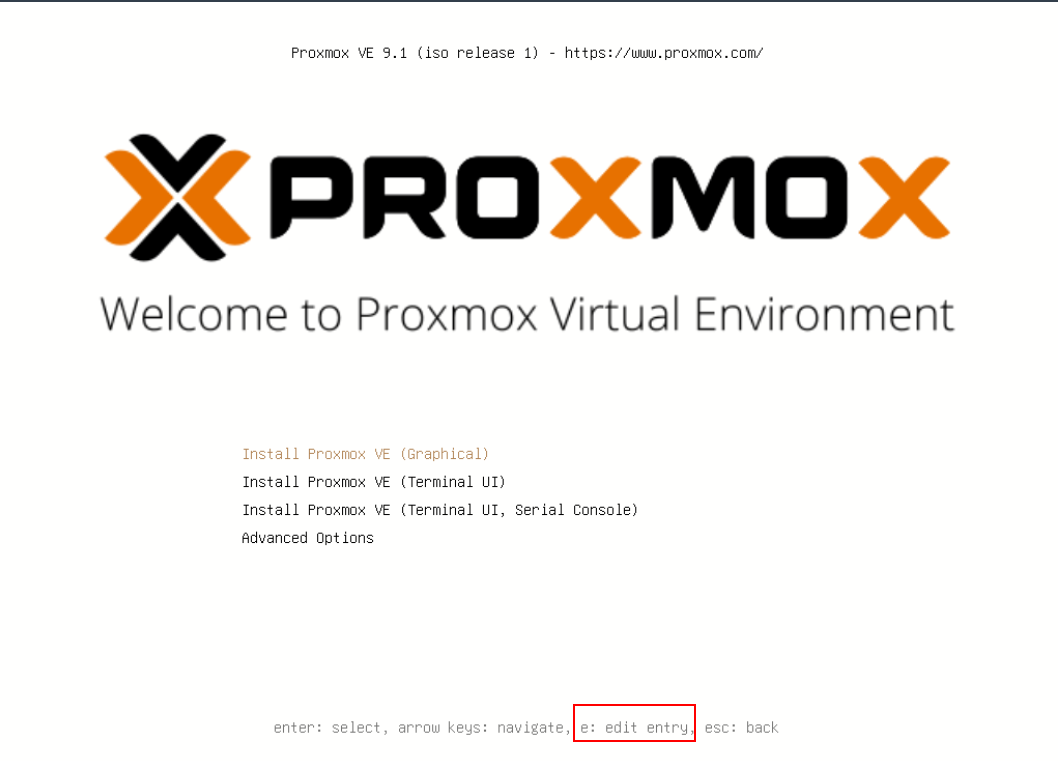
- When the Proxmox Installation menu is displayed, press “e” to edit the first choice.
- At the end of the linux row, append “nomodeset” after splash=silent, then press CTRL+X (or F10) to start the installation.
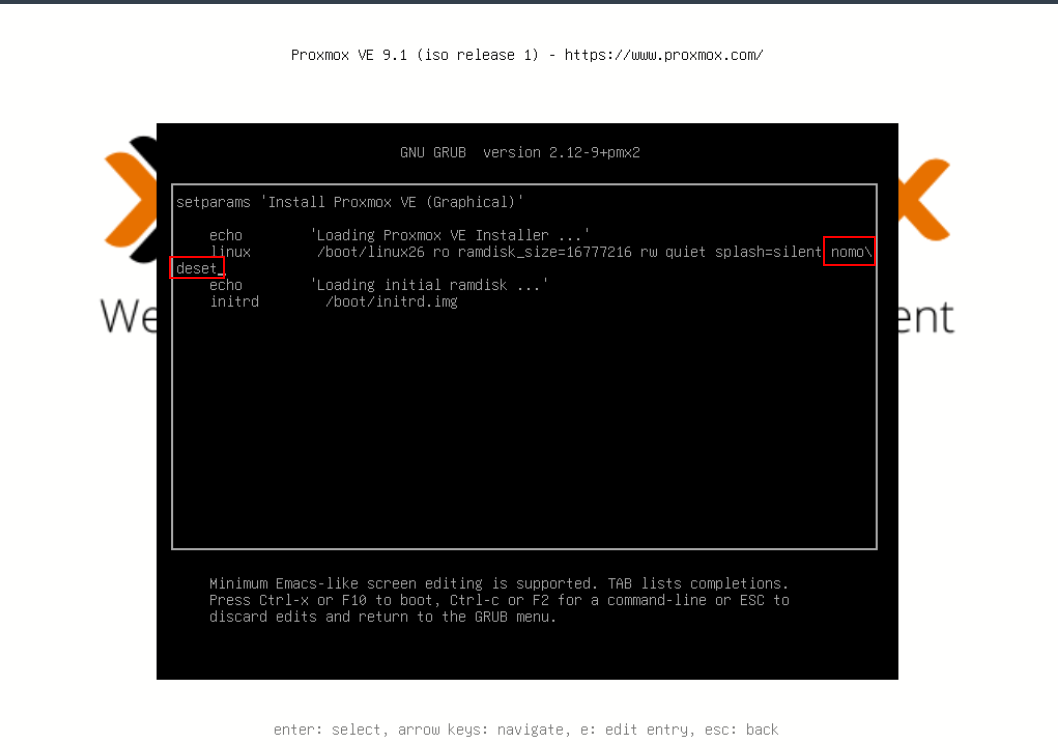
Figure 5. Change boot parameters adding "nomodeset" to linux lineThe installation procedure should continue with no other issues.
- The standard text installation will work if you don’t need the graphical one.
Installing Lenovo XClarity One Hub on Proxmox
In the rest of this document, we describe how to install Lenovo XClarity One Hub on the previously installed Proxmox VE 9 environment.
The standard installation procedure is described in the official Lenovo XClarity One Hub at the following URL: https://pubs.lenovo.com/lxc1/hub-install
Create a local directory on the NVMe disk
Create a local directory on the available NVMe disk, and enable all supported content types for this storage to be able to use both as VM disk repository and as Import repository for the XClarity One Hub image.
- In the Proxmox UI, select Datacenter > the host > Disks > Directory, then click Create Directory.
- Choose the available disk, your preferred filesystem type, fill the “Name” field with a self-explaining name (e.g., local-nvme) and leave checked the checkmark Add storage (or select it in case it is unchecked).
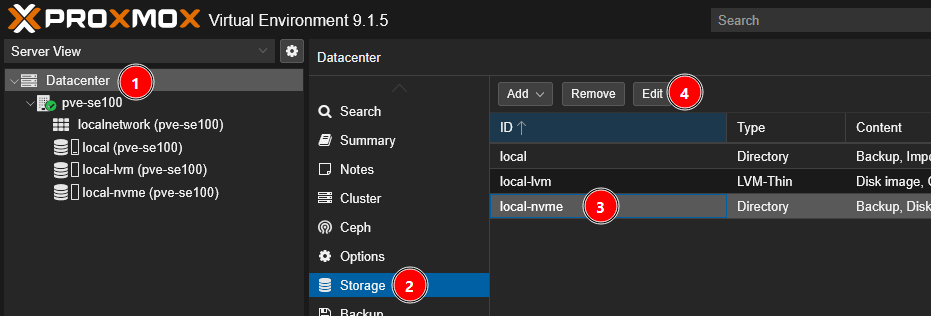
- From Datacenter menu, select Storage and then the just created directory.
- Click Edit and enable the required content types.
- Ensure that (at least) “Disk image” and “Import” are enabled as content type, then click the OK button.

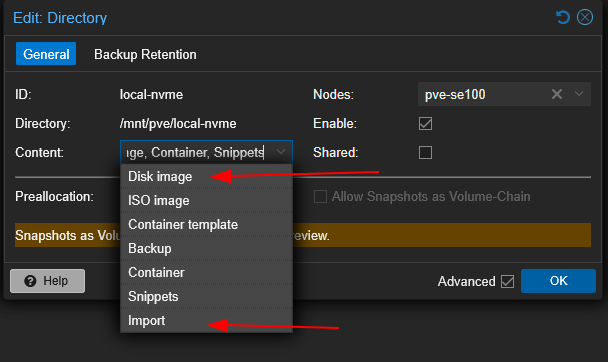
With this configuration we will be able to import the XClarity One Hub disk from GUI and import it to the VM.
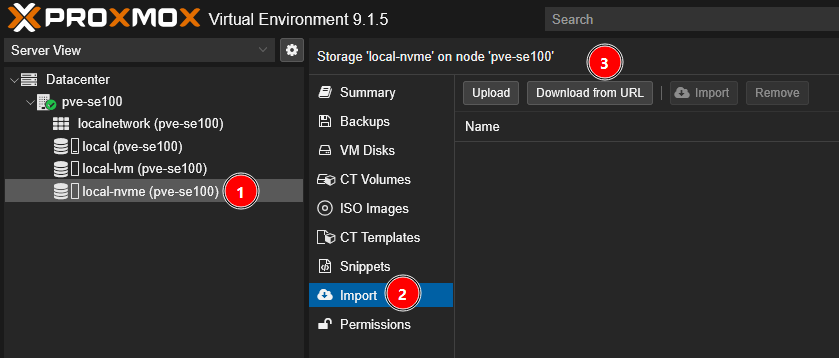
Download the Lenovo XClarity One Hub disk
Follow these steps to download the XClarity One Hub disk from the GUI.
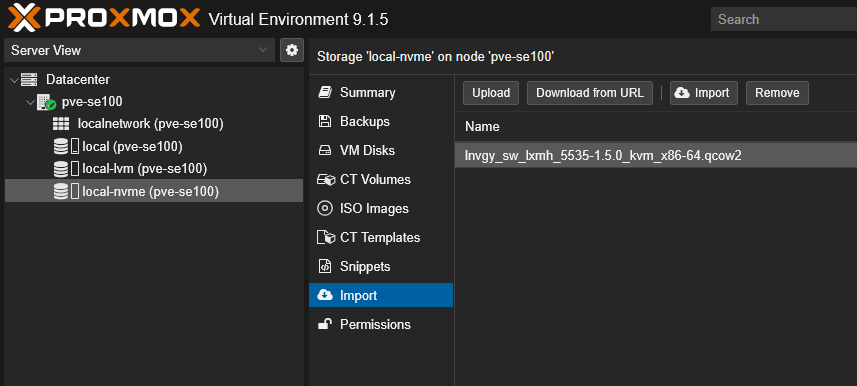
- Select the local directory, click “Import” from the middle menu, then “Download from URL”.
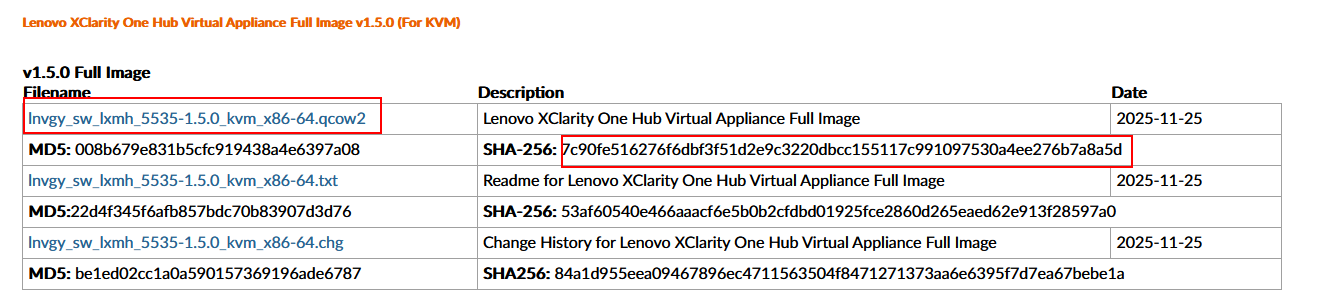
- Go to https://support.lenovo.com/us/en/solutions/ht516467-lenovo-xclarity-management-hub-20
- Choose the Full Image for KVM and copy the link
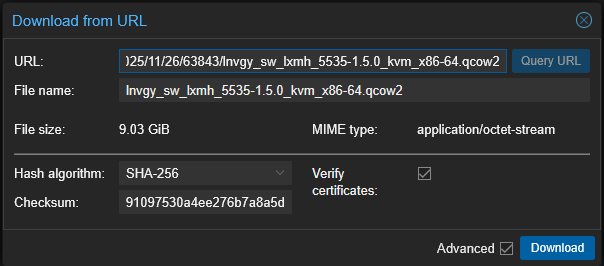
- Paste the link in the “URL” field, then choose the Hash algorithm and copy and paste the relative checksum, then click the Query URL button.
- If no errors are displayed, click the Download button.
At the end, the file will be stored in the “Import” section (i.e., into /mnt/pve/local-nvme/import directory on the local disk).

Create the Virtual Machine
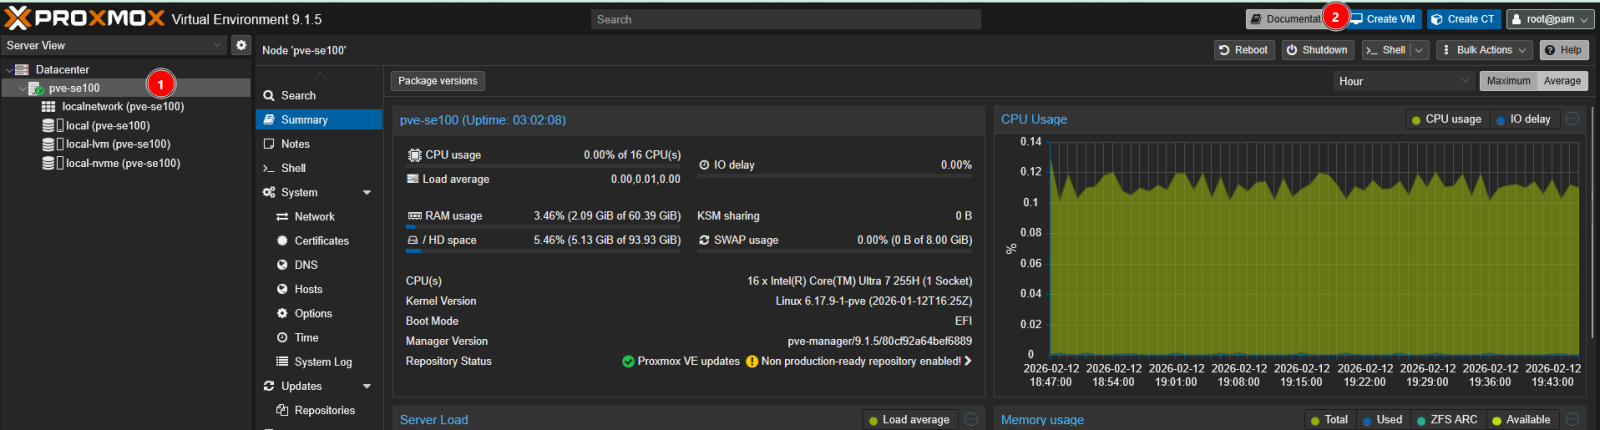
- Select the server then press the “Create VM” button.
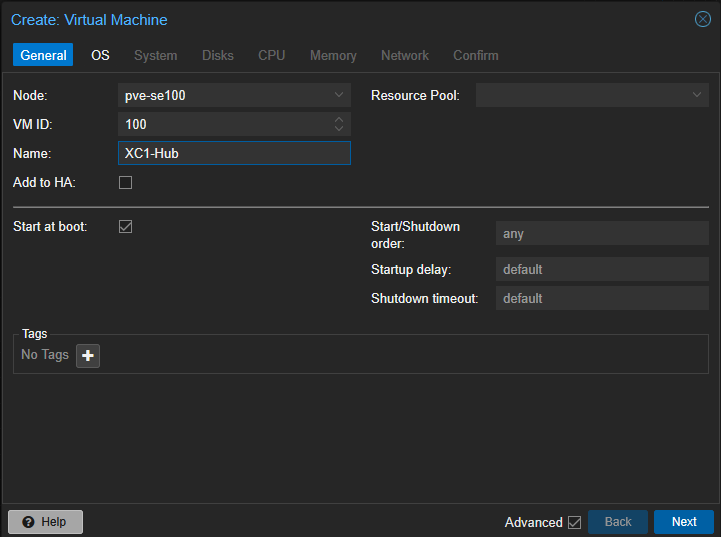
- Give the VM a name and enable Start at boot (so it restarts automatically after a power loss). Click Next.
- Select “Do not use any media” in the “OS” tab because we will import the full image disk later, then press the “Next” button.
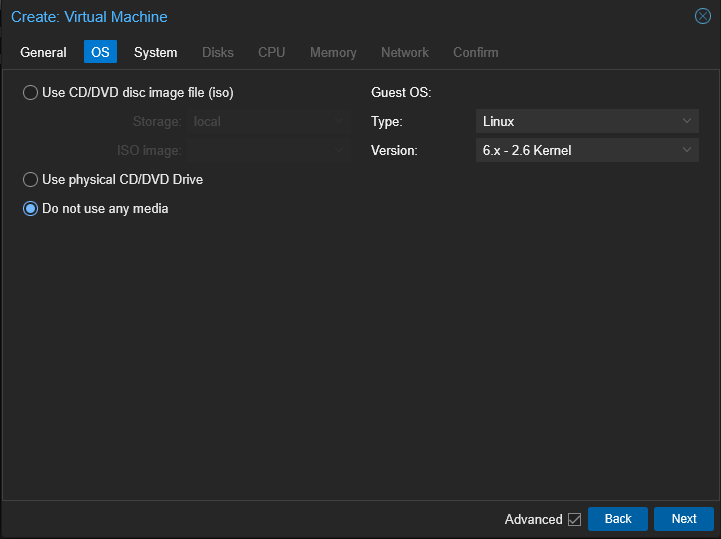
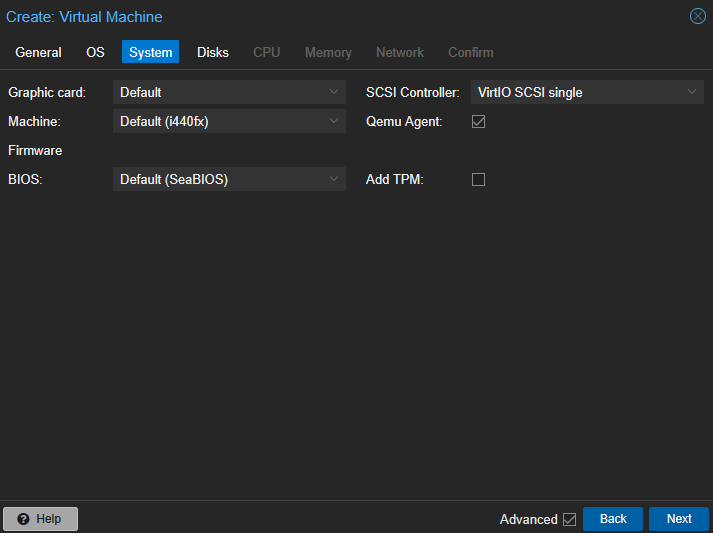
Figure 17. No need to choose external media to install the VM - In the System tab, enable Qemu Agent and click Next.
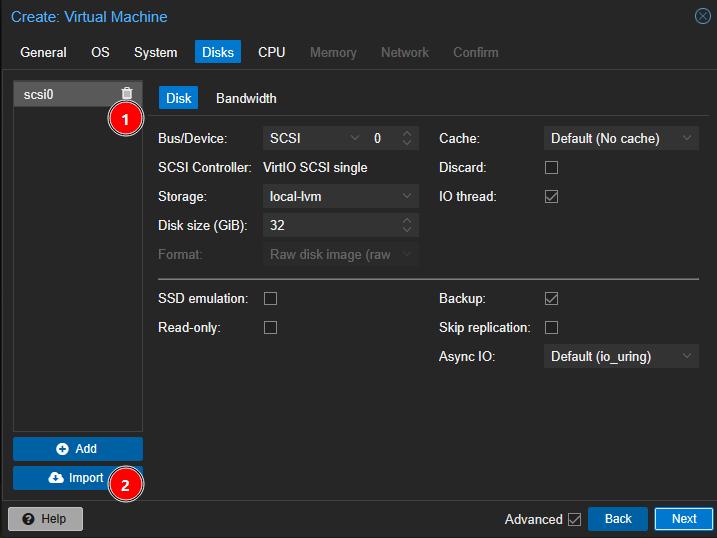
- In the “Disk” tab, remove the default disk and then click “Import”.
- Select the previously created “local-nvme” as “Import storage”, select the image file previously downloaded and choose the right target storage (in our case “local-nvme”), then press the “Next” button.
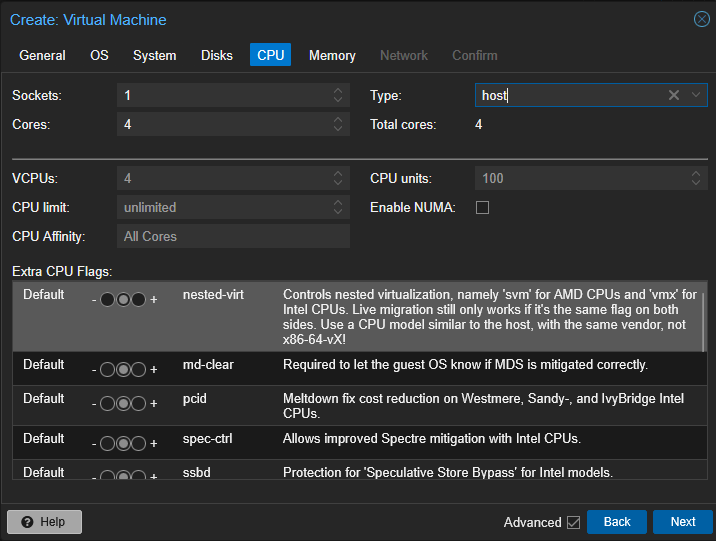
- In the CPU tab, allocate at least two cores (four cores are recommended) and set CPU type to host. Click Next.
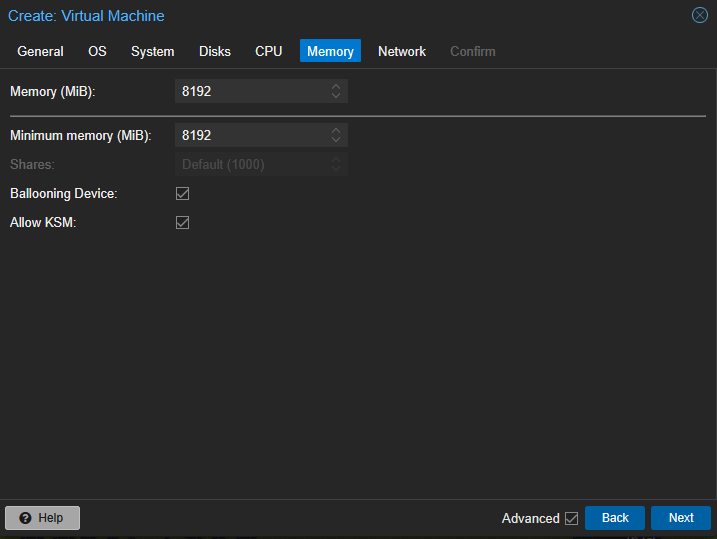
- In the Memory tab, allocate at least 8 GB (8192 MiB). Click Next.
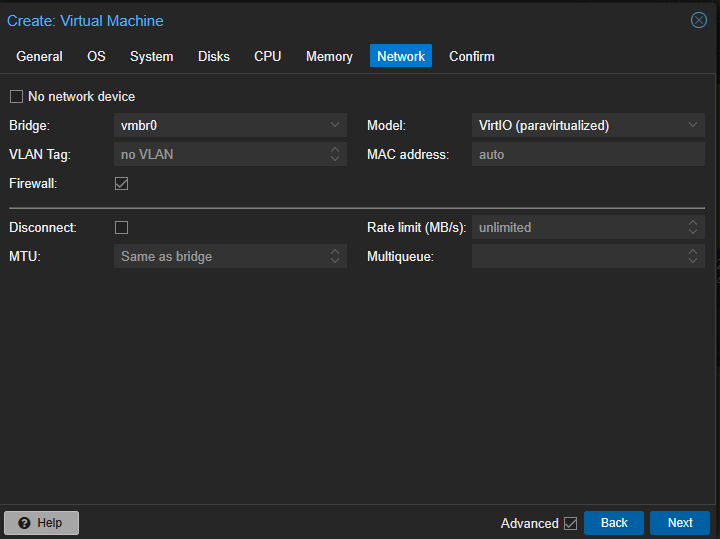
- Choose the right network parameters for your environment, then press the “Next” button.
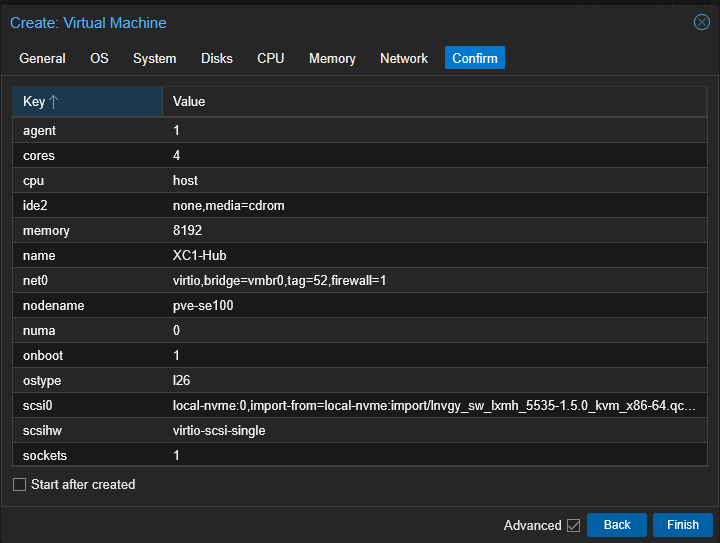
- Review the information provided and press “Finish” button if all values are OK.

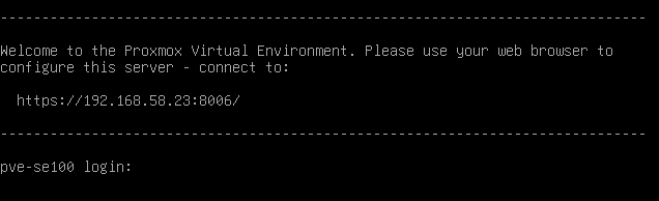
Start the VM
Once the creation process is completed, we will start and configure the VM:
- Select the VM and press the Start” button (or press the “Console” button and then start it from the “Start Now” button inside the window)
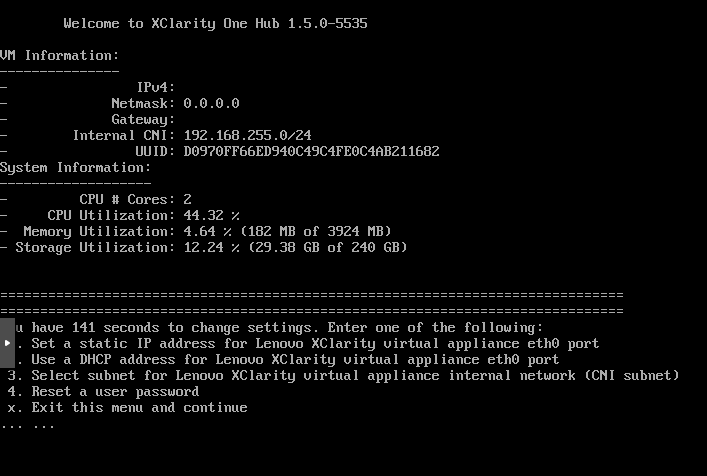
- Wait for the following menu to appear:
- Choose 1 to set a static IP or 2 for DHCP, then press X to exit.
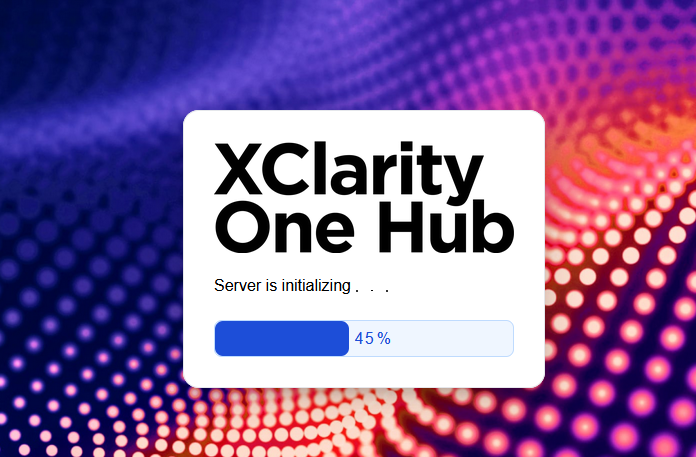
- Wait some minutes then open a web browser and point to the IP address shown in the console (e.g., https://192.168.54.4 in our case).
- Accept the self‑signed certificate warning (you can replace it later with a trusted cert) and wait for the initialization phase to finish.
- Creating a new user
- Accept the License terms and conditions.
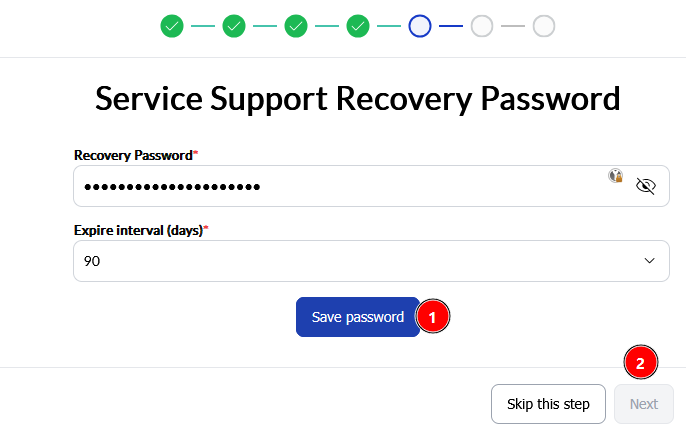
- Add a Service Support Recovery Password (store it securely)
- Set your time zone and preferred NTP server, then click Apply changes.
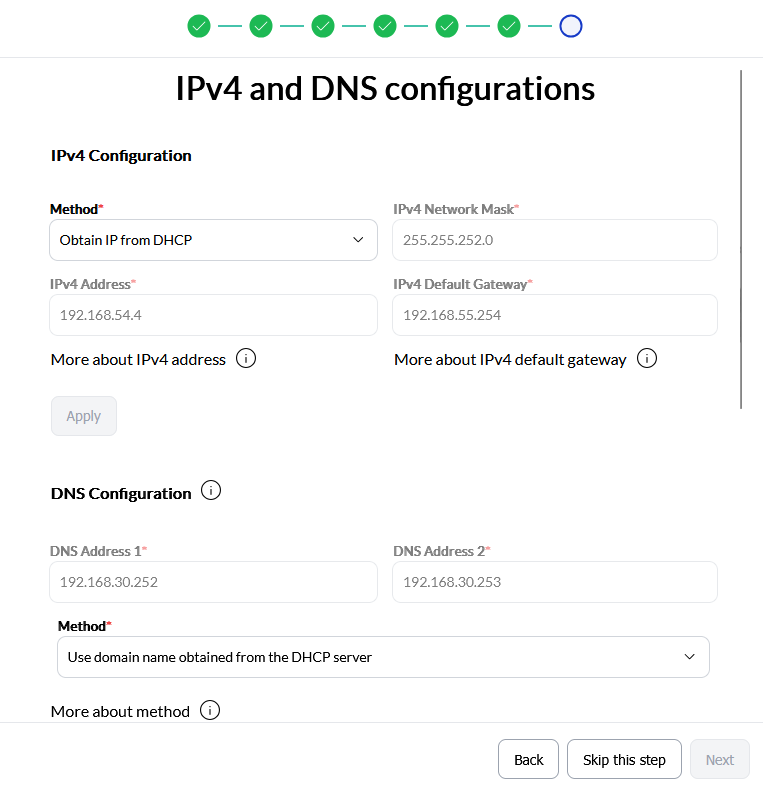
- Configure IPv4 & DNS (if needed)


Register the Hub with XClarity One (Cloud or On‑Premise)
Follow these steps to register the hub:
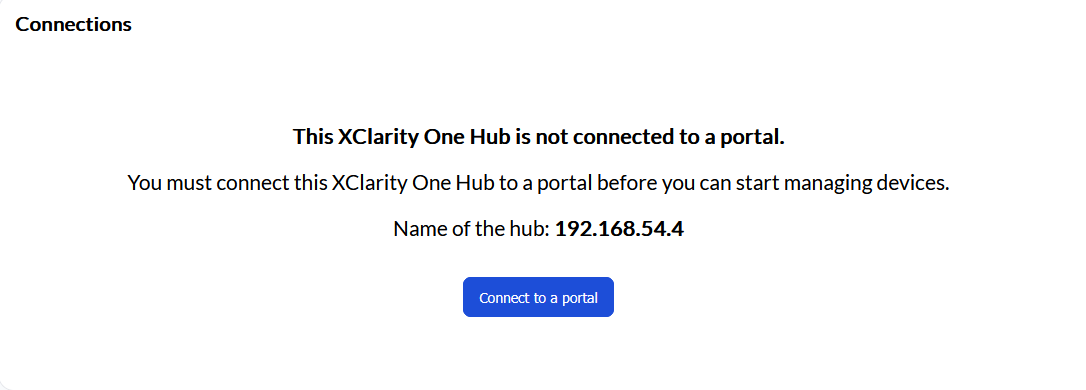
- Access the XClarity One Hub
- In the “Connection” section, click the Connect to a portal button.
- Copy the Registration Key to the clipboard.
- Access the XClarity One Portal
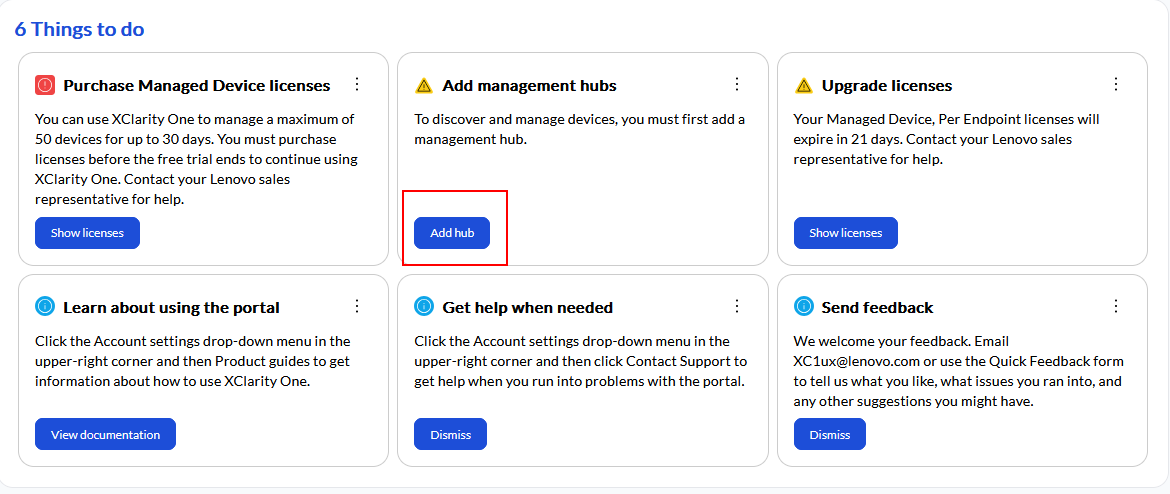
- From the “Organization management” section, click the Add hub button.
- Fill the form with a name for the hub, the country and paste the registration key previously copied, then click Next.
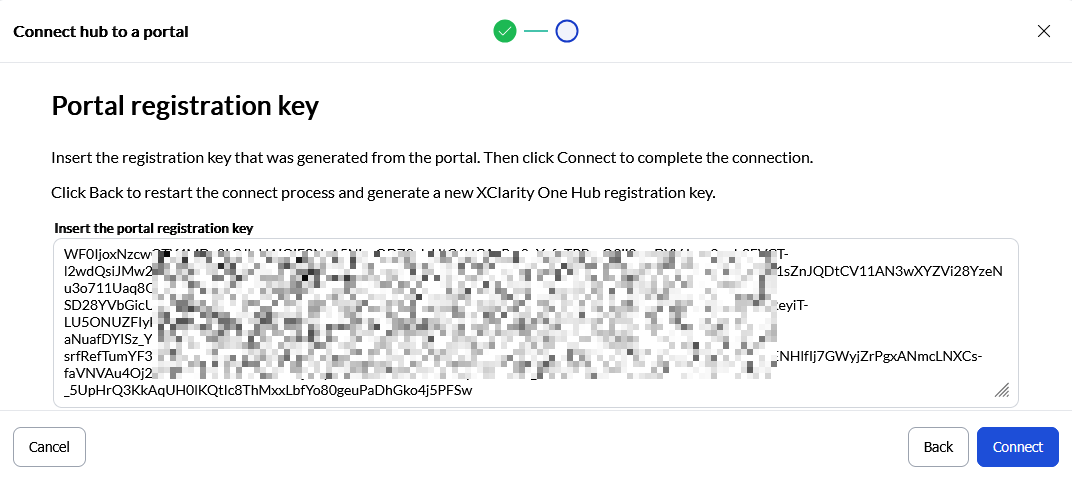
- Copy to the clipboard the registration key from the portal, then click Next.
- Go back to the Hub web interface and paste the portal registration key, then click the Connect button.
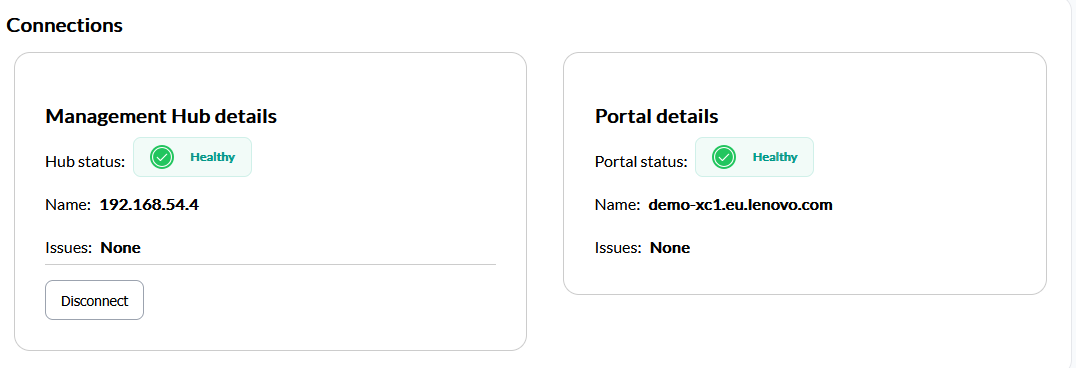
- Verify that all green checks are present.
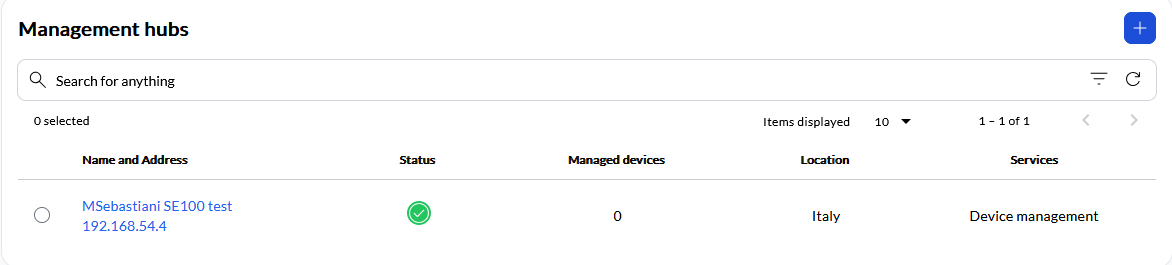
- Verify on XClarity One portal the presence of the just added hub.
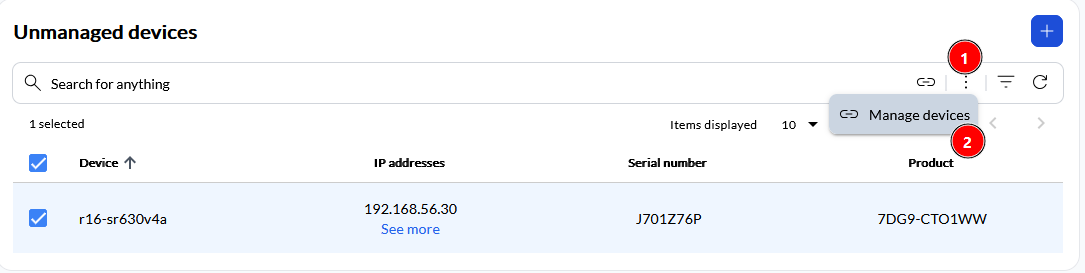
- Add to the hub your devices to manage.
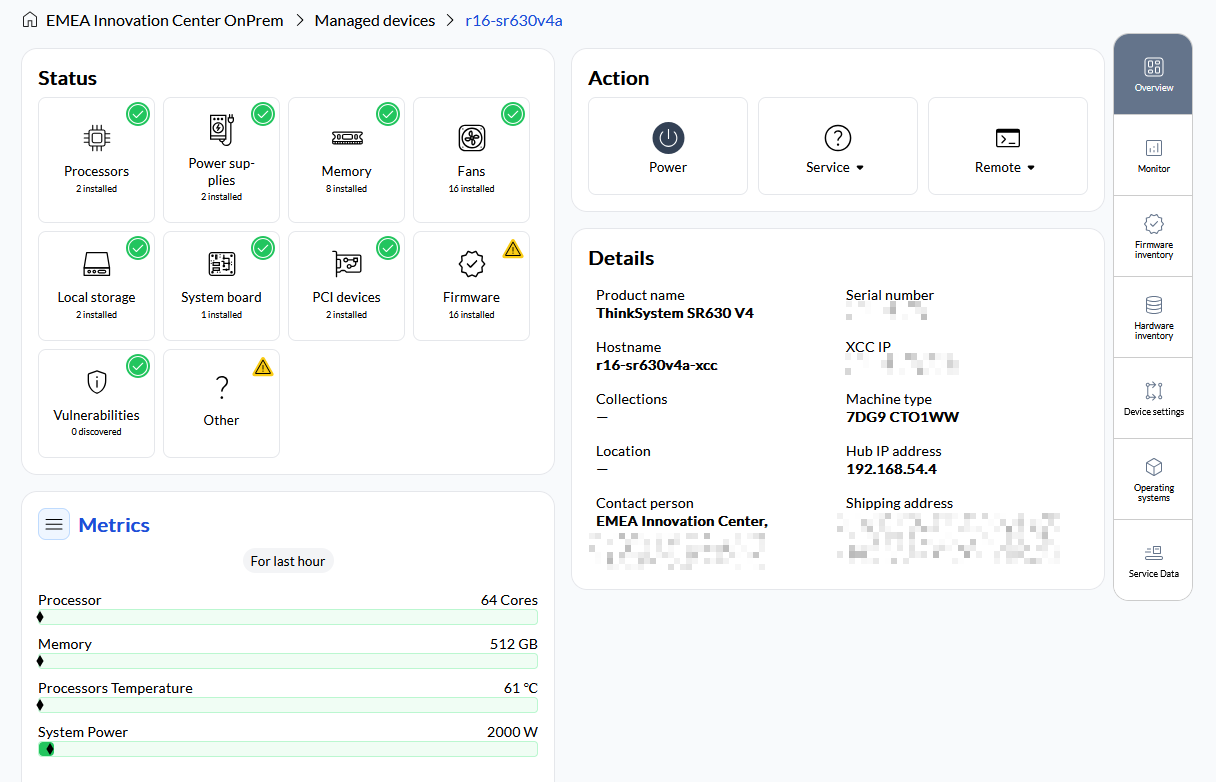
- At the end, the server will be listed in the Managed devices section.
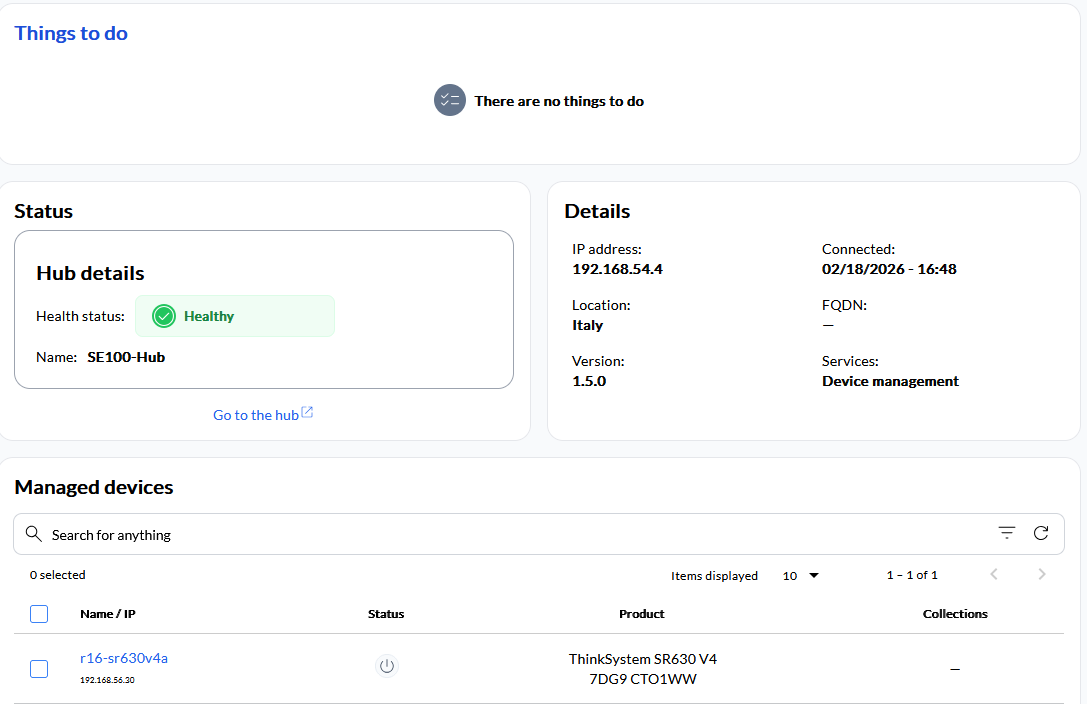
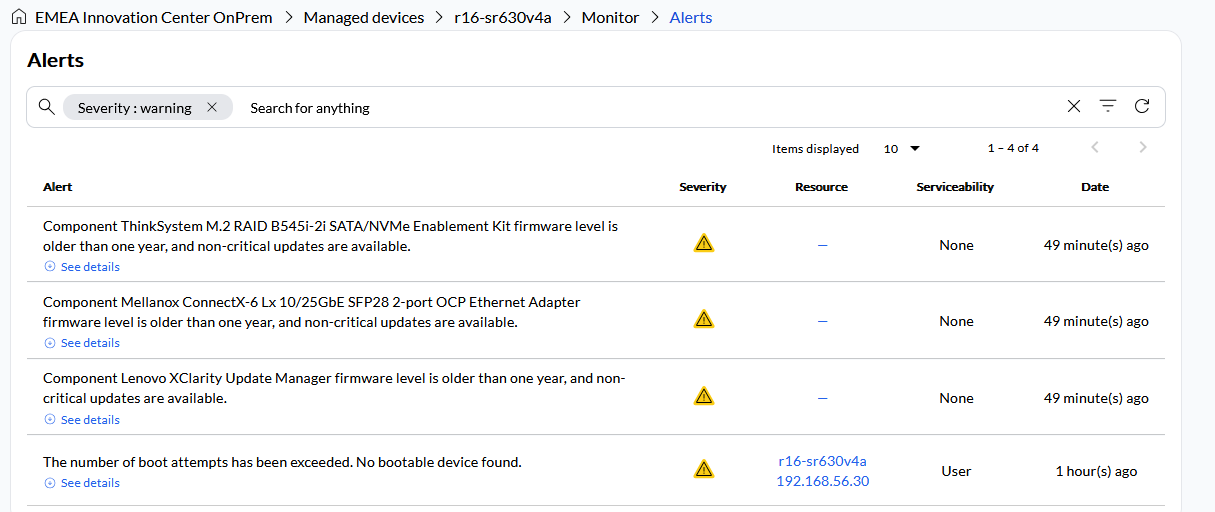
Figure 38. XClarity One Hub view from the XClarity One portal - You can take a look at the server status, metrics and details.

Authors
Mario Sebastiani is part of the Lenovo ISG Technical Sales team in Italy, where he focuses on HPC/AI and SMB businesses. He’s a Linux enthusiast with over 30 years of IT experience, most of which was spent on IBM delivery services and developing solution architectures, with a focus on security in recent years. Mario joined Lenovo in 2022 and has recently been deepening his knowledge of AI solutions.
Gianfranco Bauco is part of the Lenovo ISG Technical Sales team in Italy and focuses primarily on relationship management with customers. He has 30 years of IT experience, starting with IBM and continuing with Lenovo after the System x acquisition. Currently, he is focusing particularly on AI-optimized solutions. Gianfranco’s professional journey includes several manufacturing roles, as well as EMEA L3 Technical Support. He then transitioned to a technical role for the x86 business.
Trademarks
Lenovo and the Lenovo logo are trademarks or registered trademarks of Lenovo in the United States, other countries, or both. A current list of Lenovo trademarks is available on the Web at https://www.lenovo.com/us/en/legal/copytrade/.
The following terms are trademarks of Lenovo in the United States, other countries, or both:
Lenovo®
ThinkEdge®
ThinkSystem®
XClarity®
The following terms are trademarks of other companies:
Intel®, the Intel logo is a trademark of Intel Corporation or its subsidiaries.
NVIDIA® and NVIDIA RTX® are trademarks of NVIDIA Corporation.
Other company, product, or service names may be trademarks or service marks of others.
Configure and Buy
Please select a locale
Full Change History
Course Detail
Employees Only Content
The content in this document with a is only visible to employees who are logged in. Logon using your Lenovo ITcode and password via Lenovo single-signon (SSO).
The author of the document has determined that this content is classified as Lenovo Internal and should not be normally be made available to people who are not employees or contractors. This includes partners, customers, and competitors. The reasons may vary and you should reach out to the authors of the document for clarification, if needed. Be cautious about sharing this content with others as it may contain sensitive information.
Any visitor to the Lenovo Press web site who is not logged on will not be able to see this employee-only content. This content is excluded from search engine indexes and will not appear in any search results.
For all users, including logged-in employees, this employee-only content does not appear in the PDF version of this document.
This functionality is cookie based. The web site will normally remember your login state between browser sessions, however, if you clear cookies at the end of a session or work in an Incognito/Private browser window, then you will need to log in each time.
If you have any questions about this feature of the Lenovo Press web, please email David Watts at dwatts@lenovo.com.


